EXTENDING HOTKEYS IN UNITY
After spending some time in the Unity editor almost every level-designer thinks about how to accelerate the workflow and adapt it for individual needs. For example, sometimes you may need a "deselect all" hotkey, but the Unity editor has no button for this. You must click on the skybox or an empty area in the hierarchy or project window to deselect objects, but that's really uncomfortably. Unfortunately, Unity has a very limited hotkey list by default and we can't add other actions and keys from the settings menu.
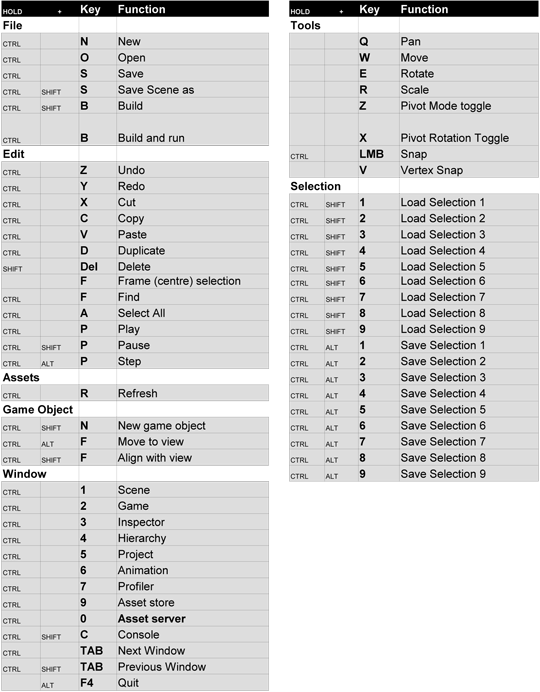
Standard Unity hotkeys. Only some of them can be changed in preferences.
However, Unity allows us to extend the editor by creating editor scripts. We can write a very simple C# script and bind almost all actions to hotkeys on our keyboard.
What we need:
1. Add UnityEditor library to your script;
2. Use MenuItem attribute to add new items and hotkeys to the main menu of the editor;
3. Use Undo.RegisterCreatedObjectUndo function to make the action cancelable if you are creating objects;
I wrote a simple script with shortcuts for my frequent actions. You can download it and put it to the directory: Assets/Editor. You will see a new menu tab named "NOT_Lonely" after the script compilation.
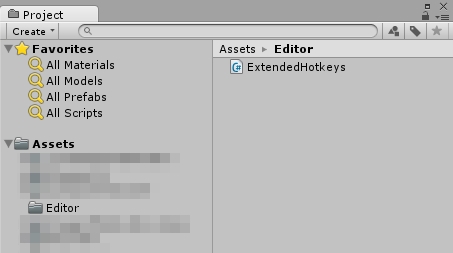
ExtendedHotkeys script inside Assets/Editor directory.
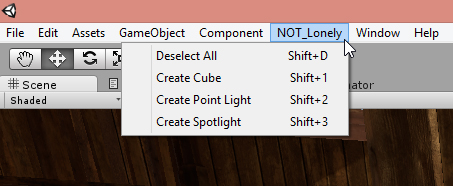
Main menu tab after adding the script.
Hotkeys I use in this script:
Shift + D - Deselect all;
Shift + 1 - Create a Cube in front of the scene camera;
Shift + 2 - Create a Point Light in front of the scene camera;
Shift + 3 - Create a Spotlight in front of the scene camera;
You can also modify this script by adding your own shortcuts. Use it to accelerate your work!
Download ExtendedHotkeys.cs
By the way, you can check out this awesome Unity asset that has much more functionality than my script: Handy Tools by Nitras Interactive.
